Pages

Thursday, May 3, 2012

Put Your Best Foot Forward ~When Buying A Mother’s Day Gift


Treat your mom with a fun and foot- nomenal  gift this Mother’s Day. There’s nothing like bringing the spa to her home. Put together a pedicure bundle of goodies that she will use for a long time and thank you relentlessly for being so gracious. My mother and I have being doing this for years and it always brings us closer. It’s more than convenient and in the long run it’s very inexpensive. 

The Essentials: 

1. The Serene Soak
Relax and infuse her feet in this one of a kind pedicure spa. Have mom add moisturizing foot salts with aroma’s such as lemon, lavender, or eucalyptus.
Homedics PedicureSpa Salon FootBath: (Go to Walmart.com-Sale: $39.97, List Price: $49.99)

2. Foot Repair
Scrub, nip, clip, file, and moisturize with these necessary accessories. Top to Bottom: Sally’s Beauty Supply: Heel to Toe Pumice Stone & Foot Brush-$3.29, All Season Cuticle Nipper- $10.99 (This is a must buy), Heel to Toe Toenail clipper- $2.39; Sephora’s Glass File (Amazing, lasts forever, and doesn’t cause splitting); Burt’s Bees Coconut Foot Cream, $9,00. 

The products listed above are just suggestions. You can add and buy accessories as you please. 

3. Go Bold With Color
Give her a color that screams her vibrant and one of a kind personality. Then hit it with a top coat and have her flaunt those gorgeous feet. Everyone will think she got a professional pedicure.  

My favorites:
 

Monday, April 2, 2012

The Ultimate Man~


Girls it’s not always about us, men need to equally know about skincare. There is absolutely nothing unmasculine about trying to have a good complexion. Your skin is the largest organ you have and it helps protect you from many elements in our environment. More importantly, your skin reveals a lot about your diet and general health. No matter how much time you spend in the gym, women look at your face first. Here are some quick tips and product recommendations to looking resilient, sexy , and masculine…….

1.       Always keep hydrated with water. Naturally, your drinks shouldn’t have calories. 

2.       Avoid too much sun exposure. By this I mean, avoid burning your skin. The sun will allow you to make vitamin D, which is helpful in keeping your skin healthy, but too much sun can cause skin damage and possibly cancer. 

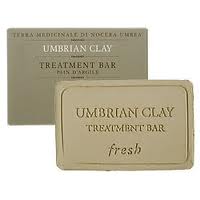
3.       Cleanse your face daily to wash away dirt and dead skin (If you’re going to choose between cleansing, exfoliating, or moisturizing. Go with cleansing, it’s absolutely important.)Typically, men have larger pores and sebaceous glands, which produce too much sebum (a.k.a. oily sweat). To cut through the grease, I recommend using a simple bar of soap, such as Burt’s Bees Natural Skin Care for Men, Bar of Soap ($4) or Umbrian clay bar by Fresh ($35). The ingredients have no chemicals or junk that further damages your skin. Also, this step sets you up for a better shave. 

4.       Exfoliate. Exfoliation will make a big impact on your appearance. Try an inexpensive and accessible product like Baking soda. Apply a ¼-½ tsp to your hand, add a couple drops of water to make a paste, GENTLY rub your skin and wash off. So simple! 

5.       Shave. Always shave with hot water on moist (not wet) skin. This helps to soften your beard and lubricate the skin. I recommend shaving in the shower. Always frequently change your blades. To learn how to correctly shave, pamper yourself to a store called The Art of Shaving. I recommend their Traditional shave package ($35). This is basic enough to see the steps needed to learn good technique.  I know many professional men who are regulars and say it’s worth the cost.

6.       Moisturize. Make sure you moisturize after you cleanse, exfoliate, and shave. Many men feel that adding lotion to their skin will make them oily. In fact, it’s the complete opposite. When your skin feels deprived of moisture, your feedback system in your skin will want to produce more sebum. Unfortunately, the body produces too much and you’re stuck with a greasy face.
I recommend L’Occitane BAUX After shave moisturizer ($30). 

Don’t feel obligated in doing all of these steps every day, but listen to your skin and decide for yourself what works best for you. The products recommended are of great quality, because this is true, you don’t have to use as much.

Monday, March 5, 2012

Extend Your Look With Extentions

Have the flexibility, but without the cost. Extend your look with clip-in hair extensions by adding length, volume, and fullness to your own hair. When I was younger, I was teeter-tottering between getting professional salon hair extensions or making my own custom clip-in hair extensions. I’m thrilled I went for the clip-ins. For years, I have had the flexibility of changing my hair style for weddings, special occasions, travel, or just everyday fun. My goal is to show you how to make your own custom clip-in hair extensions so you can get the gorgeous look you have always wanted. 

1) Purchasing Your Hair Extensions*

Always buy REAL hair. This is absolutely key. Synthetic hair can melt with heat, meaning you can't curl, straighten, or blow dry. Also, pick extensions that match your hair color. To do this correctly the first time. I strongly recommend you go to the store and put the extensions next to your hair. Don't worry if there is no perfect match, you can always dye real hair to your color needs. Recommended stores: Sally Beauty and Ulta. 

2) Products Needed*

-Hair Extensions: Length 14" or 18" (I purchased 18"). Brand: Remy, Sassy, or Jessica Simpson are great quality.
-Durable Sewing Needle and Thread (Thread should match your hair color)
-Tape Measure
-Hair Extension Snap Clips
(You will need 9-15 clips, depending on your head size)


3) Cut and Sew*


Remove hair from package. Cut hair according to your head size. I recommend cutting 5 pieces: I cut one 7 inch piece for the base of my head, one 6 inch piece to be clipped in one inch above that layer, one 4 inch piece to be clipped in one inch above that layer, and two 2 inch pieces for the sides of the head (This makes your extensions look like you have layers). View picture above to see the number of clips I needed (14) and spacing. 


Sew in one clip at a time. Make sure the teeth of the clip are facing out. Sew thread through each hole to make a tight fit. I used the whip stitch method, which means I started on one side, tied a knot, then whipped a stitch through each hole until I got to the end, then tied a knot. (To learn how to whip stitch I suggest going to You Tube. There are many quick and easy tutorials.)

4) Clip In Hair Extensions*

a. Practice opening and closing the clip. With the teeth side facing you, put both thumbs on each side of the clip and the index fingers at the front side of the piece. Snap open and close by applying pressure away from and towards you with the thumbs.

b. Practice snapping your hair.  Using one of the 2" pieces, practice attaching and removing the extension piece. 


c. Separating the hair.Using a tail comb or your index fingers, practice parting the hair where you wish to attach the first extension.


d. Clip up the hair above the part. Place the longest piece of hair at the base of the head. 


e. Placement of the hair piece. Select the largest piece to go on the base of the head and snap open all the clips. The clips should be placed on your own hair below the part so that that top of the hair piece is even with the part. From left to right place the clip on your own hair just below the part. Moving the clip downward, catch your own hair in the clip and snap it shut. Check for gaps and adjust as needed. 

f. Preparing to the place second piece.  This piece will be placed above the first piece. Release all the hair that was clipped out of the way in step e. Then, slightly above the first piece that was just attached, make another part - as explained in steps c through e. Repeat this step by adding a third piece above the second piece. Follow steps c through e once more. 
 
 g. Adding the side pieces. Place your shortest pieces on each side of the head (ex. 2 inch pieces). Using only one piece on each side. Follow the same directions c through e to apply extension. 


H. Your DONE! Let you hair hang. Cut, curl, blow dry or straighten your extensions to your style. SIDE NOTE: Extensions have allowed me to have beautiful up-do's for special occasions. 


I. Removal & Maintenance. Remove extensions by unclipping hair pieces starting from the top of your head to the bottom. Maintain your extensions like your own hair. Wash, shampoo, condition, and blow dry as needed. 

 Now you can enjoy the benefits of long, full, and gorgeous hair without the salon cost. Life expectancy of the hair extensions can range from 1-3 years depending on use. Enjoy!

Monday, February 13, 2012

Last Minute Spa Gifts for Your Loved One


Here are some great spa packages for your loved one or treat yourself to one of these decadent beauty finds. Nothing says I love you when indulging in Chicago’s finest spas. 

1.ASHA Salon & Spa (all locations)http://ashasalonspa.com/

Triple the Amount of Love:
Treat your loved one on Valentine’s Day with a package comprising of a 30min Sandalwood Massage, 30 min Chamomile Lavender Facial, and a Lavender Mint Foot Reflexology - $75 (actual value: $150) save 50%.

Or

Get a Chocolate Truffle Pedicure- $65 , ahhhhhhh this sounds as amazing.

2. Spacio Spa (Lincoln Park)http://www.spaciospa.com/
               
Spacio is a luxurious urban spa located in Chicago. This is a great retreat from the noise and commotion. Enjoy a treatment for yourself and your loved one with a Couple-in-love Massage and a Fannie May box of chocolates - $185 (actual value: $230).  New clients save 20% on their first service.

3. Tirra Salon and Spa- rated #1 Chicago salon and Spa (Lincoln Park)http://www.tirrasalon.com/

No Valentines Packages advertised by Tirra Salon and Spa, but this salon offers an amazing Aveda Body Polish with massage- from $60-that will shed you from your winter skin. Also, try the Aveda Salt Glow with massage- from $60- which will give your skin that young and smooth look. Either of these treatments detoxifies your skin.

4. Galos Salt Cavehttp://www.galoscaves.com/

Do something different this year or if you’re the adventurous type this salt cave experience will make for a unique date. Galos salt cave is popular with the Europeans and provides a peaceful and relaxing oasis combined with healing properties. Prices vary with age from 5-30$ per 45min session.
               

Thursday, January 5, 2012

NARS make me look like the stars


This winter give yourself a bold new look. Now is the best time to take advantage of your pale winter complexion and contrast it with a POP of color. Feel like a celebrity with NARS lipstick line. Their sultry yet confident colors are so addicting. I personally have fallen in love with their shocking matte pink lipstick called Schiap. Other great colors are Manhunt, a sheer poppy red, and Shrinagar, a metallic raspberry. 


Schiap lip color


                                                                                                                 Manhunt lip color


                                                                     Shrinagar lip color

 How to wear:

Keep your eyes simple with a black eyeliner, no shadow. Embrace your pale complexion with a natural foundation and add some glow. Now flaunt your gorgeous lips. SIDE NOTE: I would also recommend purchasing the matching lip liner to keep the color looking bold. 

Where to buy:
www.narscosmetics.com      $24
www.sephora.com                  $24

                                 
                           We can always take advice from the best....